Blog
An exploration of the art and
craft of software development

Facebook Connect with Facebooker
Posted by Marty Haught on Tuesday, April 20, 2010I’ve recently done two Facebook Connect integrations for my clients and found a lack of accurate instructions on how to wire things up with Facebooker. Facebooker still appears to be the easiest, most complete Ruby library for interfacing with Facebook so I’m going to write up instructions based on what I’ve done. Warning, as Facebook seems to often change its API at a whim this post may become inaccurate in the future, YMMV.
A quick update now that I’m done with this post. I thought it would be shorter but it turned into a full blown tutorial. I kept finding that I needed to give examples and explain things further to be of use. I also have broken it into parts. This first part will get you started with Facebook Connect. It’s not a five minute read but if you want to see the fine details of using Facebook Connect with Rails, this should get you well down that road! As always, comments and questions are welcome. If you have found a better way of doing something here, please share it with the rest of us.
About Facebook Connect
These instructions are meant for integrating a stand-alone Rails 2.3x application with Facebook using Facebook Connect. The reasons you would do this vary but the two main reasons I see is that you want your app to interact with Facebook by tapping a user’s friend list and publishing content to their stream. Another nice benefit is that you don’t have to handle authentication or user activation beyond wiring up a few calls to Facebook. I’ve seen a rise in stand alone applications using Facebook Connect over the past several months and more and more clients are asking to take advantage of the Facebook platform. Additionally, Facebook has a pretty extensive developers wiki which is full of detail but overwhelming when you’re just starting out.
Hopefully this tutorial can help understand the best way for a Rails app to do Facebook Connect integration.
Create your Facebook App
One of your first steps is to log into Facebook and create an application with this url: Create Application. If you haven’t already added the “Developer” app, you’ll be asked to allow access. Click Allow as this is how you will manage your application’s Facebook settings going forward. You may end up on the developers application page in which case you’ll need to hit the “Set Up New Application” button. Otherwise, you’ll land on the create application page. Either way, you’ll be asked for a name, which can be whatever you want to remember it by and agreement with their terms. I do highly recommend you actually read their terms of service as they will come after you if they catch you violating them. A fellow developer in Boulder recently had some unpleasant contact with their legal department over a violation.
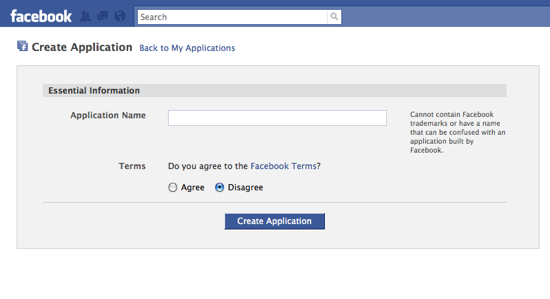
One other piece of advice is that I would make separate development and production Facebook applications to work with. This will simplify your life in configuring your different environments and let you keep dev/testing concerns out of your production Facebook app. It is totally possible to have just a single Facebook application for all environments but I’ve found I didn’t care for that. Besides, creating Facebook apps is super simple and there’s no drawback that I can tell to making lots of them.
The next page will land on the ‘Basic’ tab and will hold two very important pieces of information. Copy down your API Key and Secret. You will need these to authenticate calls from your Rails application to Facebook. There are plenty of other things you’ll want to update here but they don’t matter for getting started and you can come back to them whenever you want.
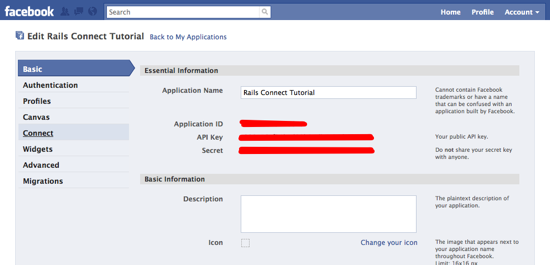
Oh, finding your way back to your application’s Facebook settings page is not obvious. You’ll need to click the “Applications” link on the side bar of your Facebook home page. That lists all the apps you’ve installed. There you can click on the “Developer” application. On the Developer home page, you’ll see a right side bar that lists your applications. Click your app and you’re back to the profile page for it.
Alright, back to finishing the app settings. Another thing to note is that during this settings section, you only have to hit the “Save Changes” button at the bottom once you’re done. The left tabs will keep your form data as you switch between sections. Feel free to explore the other tabs but we’ll be concerned with only one other tab for now, Connect.
On the Connect tab, you’ll be setting the urls for your FB Connect Rails application. If you don’t update this then your FB connection buttons will fail. The two most important fields are Connect URL and Base Domain. You’ll probably want to set up the rest but we can do that later. The Connect URL is the url to your Rails application. I personally use passenger for local development and I’ve gotten into this pattern: http://local.
The other important piece here is the Base Domain. Here you’d enter your
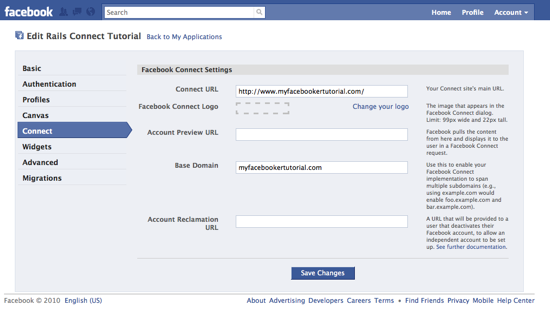
That’s it for now. Hit “Save Changes” and move on to installing Facebooker. If you were building a canvas app or something that needed callbacks from Facebook you would need to add additional settings.
Install Facebooker
I’ll assume you already have a Rails application set up as I’m not going to cover getting started with Rails here. For development we’ll want to make sure that the base domain matches how you’re accessing the app through your browser.
I prefer to install Facebooker as a plugin with the following command:
script/plugin install git://github.com/mmangino/facebooker.git
Please do look over the Facebooker readme on Github for more details on other ways to install it.
Once the plugin is installed there will be a config file in config/facebooker.yml that you need to edit. You’ll notice that three environments are started for you. We’ll just work with the development settings. Add your API Key and Secret. Since we’re building a Facebook connect site set set_asset_host_to_callback_url to false. Save your changes.
The last piece is we need to generate the xd_receiver file. This is necessary for Facebook Connect to work. You can generate it with the following command:
script/generate xd_receiver
Add the two files it generates (public/xd_receiver.html and public/xd_receiver_ssl.html) to your repo as you’ll need them in the future.
Login
Following ‘the simplest thing that will work’ philosophy, let’s add the FB Connect button to your Rails app. The first part will be to add two helpers to the HEAD section of the page. Usually this would go into your layout file but you might dynamically add it in with a content_for block if you don’t want the facebook javascript includes on all pages.
  <%= fb_connect_javascript_tag %>
  <%= init_fb_connect "XFBML" %>
The init_fb_connect method defaults to using Prototype but you can override this to another library of choice, such as jquery.
<%= init_fb_connect "XFBML", :js => :jquery %>
Finally, in the part of the page where you want the connect button to appear use the following helper.
<%= fb_login_button %>
When clicked the FB Connect button pops up a new window where Facebook handles the login process. If successful, it will set some cookies that our application can use to determine if a Facebook user is signed in. One optional thing with the fb_login_button is that we can register a javascript callback. You’ll see this often in many of the fb connect interactions. Here’s a simple example that will reload the page to the root of the domain.
<%= fb_login_button("window.location = '/';") %>
For a more complex example here I set a form variable to know that the fb_user link has been established.
  <%= fb_login_button('$("#fb_user_set").val(true);
    $("#fb_account_container").html("FB user linked. Save required.");')%>
These are nice options to have as you may want something to happen on the page once the user has successfully logged into Facebook. Without setting any sort of callback, the page will do nothing after they’ve logged in which may not be the experience you’re looking for.
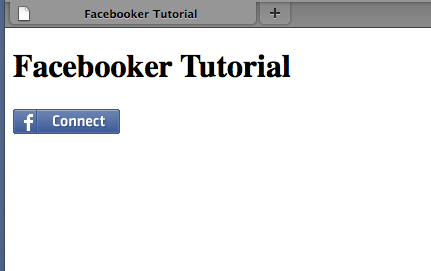
Now, in case you aren’t getting this to work there are some things to check. First, I have seen mention that the Facebook Connect library works best in valid html with the proper doctype. I personally have been doing both in all my apps for years so I don’t know what would happen if you didn’t. You might also get some Facebook errors such as invalid argument or other issues with domains or the cross domain receiver file. The best thing to do there is verify the settings in your facebooker.yml file with the settings on Facebook and your development host address. If that doesn’t cut it you can seek out help in the Facebooker Google group.
Accessing the Facebook User
Now that you’ve enabled a way to log in a Facebook user, let’s get at that data. Facebooker provides two methods that do the heavy lifting. Add these to your application_controller.rb
  before_filter :set_facebook_session
  helper_method :facebook_session
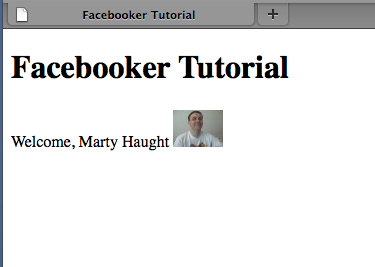
Those experienced with Rails will guess correctly what these do. For the rest of us, this will automatically look for those cookies on all requests and create a facebook_session that we can access in both the controller and view layer. Now that the facebook session has been created and is accessible we can play with it. We’ll enhance the template to display the user if logged in, otherwise give them the fb connect button.
  <p>
    <% if facebook_session %>
      Welcome, <%= facebook_session.user.name %>
      <%= fb_profile_pic facebook_session.user %>
    <% else %>
      <%= fb_login_button %>
    <% end %>
  </p>
In the above code, I’ve checked for the presence of the Facebook session and in the case that it exists, show the logged in user’s Facebook name. You can also see I added in a call to fb_profile_pic for our user. This will display their profile picture (or a default image if they haven’t set one). Otherwise, I offer the FB Connect button.
Associating FB Users
Next I am going to cover how you would tie this Facebook user to your own user model. For a basic Facebook Connect site, you’ll only need to tie the Facebook user uid to your existing User model. Facebook user uids are bigints so you’ll need to do a special migration to get this right. Here’s the example for mysql:
  def self.up
    change_table :users do |t|
      t.integer :fb_uid
    end
    #if mysql
    execute("alter table users modify fb_uid bigint")
  end
Run your migration and your user is now ready to accept the fb_uid.
Here’s some controller code for pulling the uid out of the facebook_session, assigning it to our user, and saving it.
  current_user.fb_uid = facebook_session.user.uid
  current_user.save
Most likely you’ll want to add a check for the facebook_session into your authentication code. Here’s an example from restful_authentication plugin:
  def current_user
    @current_user ||= (login_from_session || login_from_basic_auth ||
      login_from_cookie || login_from_fb) unless @current_user == false
  end
You can see that I added ‘login_from_fb’ to the end of the chain. It just checks for the facebook session and loads the appropriate User.
  # helper method for authentication code
  def login_from_fb
    if facebook_session && facebook_session.user
      begin
        User.find_by_fb_uid(facebook_session.user.uid)
      rescue Exception => e
        logger.warn "FB ERROR while logging in - #{e}"
        return nil
      end
    end
  end
At this point you have a way to create and access a Facebook session from your Rails app, and can automatically authenticate application users based on this session.
I’ll stop here for the first part. The next post will focus on permissions, publishing and offline access.
blog comments powered by Disqus


